
"Competitor-obsessed startups rarely win. Customer-obsessed startups always win." Exotel's Voice Platform handles millions of calls per day, among which 35% of total calls are recorded and uploaded to the cloud for long-term storage and customer access. In the current age of data, call recordings are...
Most engineering teams know that testing is important but it’s often overlooked due to constraints of time or just pure laziness. There’s enough literature out there touting the benefits of testing. I’m not going to reiterate those arguments, but trust me on this: “You do need to test your application. Not manually, but in an automated fashion.”
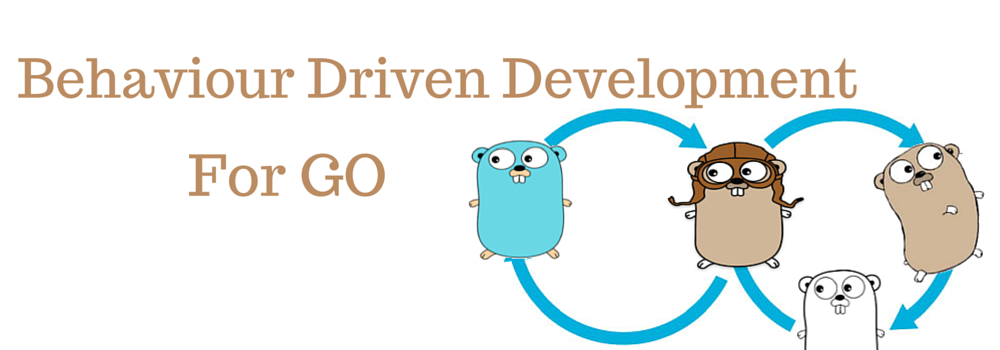
Recently, we have been migrating a bunch of our platform services to Golang. Reasons for this merit a separate blog post on its own. But for the rest of the tutorial, I’m going to show you how to do BDD in Golang.
What is Behaviour Driven Development and why should I care?
Behaviour Driven Development (BDD) is a testing methodology that has evolved from Test Driven Development (TDD). BDD is a useful way to describe your test cases from the perspective of the user. It uses a Given-When-Then format that is cognitively easy to parse. The output can be debugged and understood by both technology & business stakeholders. If you have used Behat, Cucumber etc in the past, this would be familiar to you.
Given: The user name is ABCD and the password is PWD
When:  the user inputs these credentials and Clicks on enter
Then: the user should be logged in
Go ships with a fantastic testing library. More often than not, that testing library suffices the requirements. But, at Exotel, we’ve adopted the BDD methodology simply because it gives more user-readable expressions and some of the constraints imposed by the framework force developers to avoid cryptic error messages. Also, the long-term goal was to let the QA team or the business owners themselves to add test cases as and when they see something failing.
There are a bunch of decent BDD frameworks written for Go: Ginkgo, Goblin & GoConvey. We use Ginkgo heavily within our applications. Now, let’s get to the interesting part and show you how to use Ginkgo in your next application.
The How?
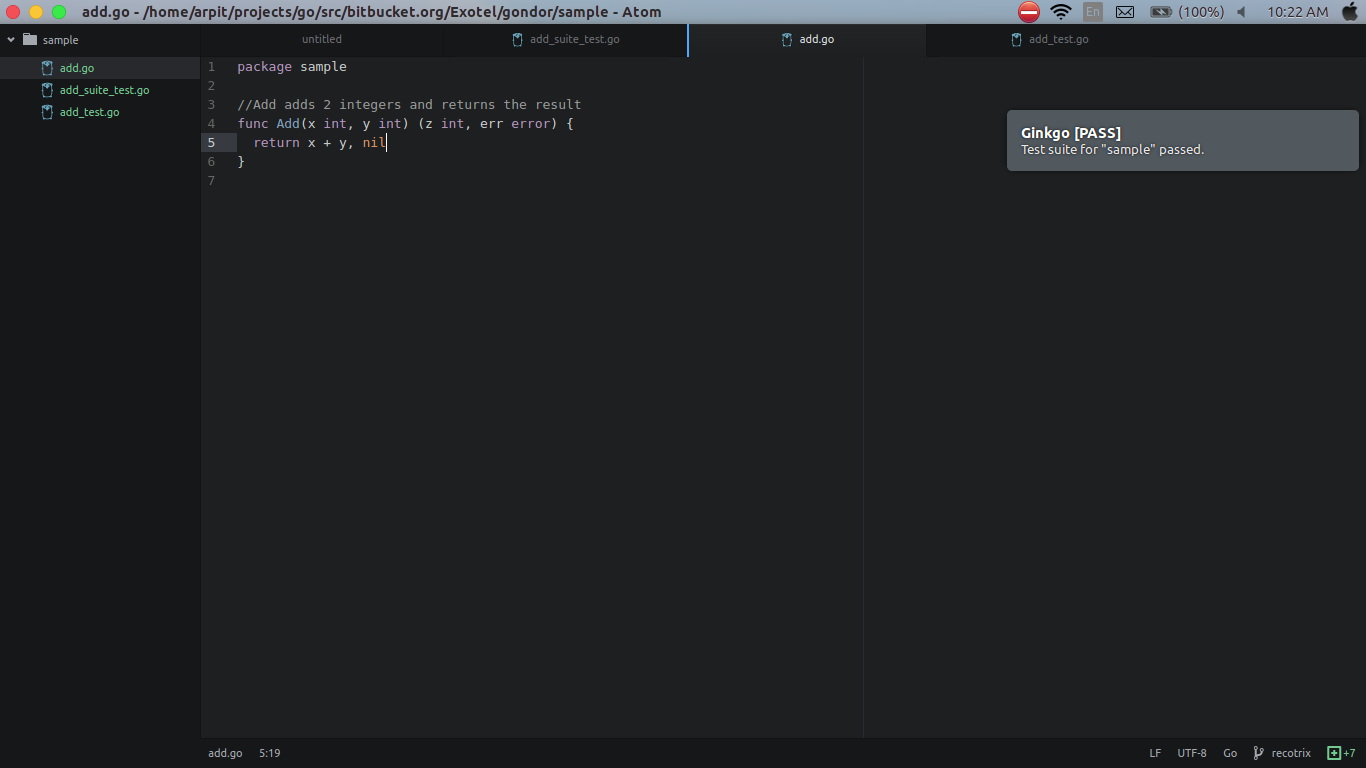
Let’s take a very simple code (as shown below) that adds 2 numbers and returns the result. Nothing fancy, but enough to illustrate the power & working of Ginkgo.
package sample
//Add adds 2 integers and returns the result
func Add(x int, y int) (z int, err error) {
    return x + y, nil
}
Now let’s write a test case in Ginkgo. I know this is not pure BDD, but it’s easier to reason with. In an ideal world, we should have written the test case before we wrote the code, but it’s OK. As long as the tests are there, it’s good enough for us 🙂
As per Go convention, the test files must be present in the same folder as the source code. Also, test files must be suffixed by _test.go. This helps Golang identify this as a test file and not a source file.
First let’s add a test suite. All our tests will be registered with this test suite. Create a file called sample_suite_test.go
package sample
import (
. "github.com/onsi/ginkgo"
. "github.com/onsi/gomega"
"testing"
)
func TestSample(t *testing.T) {
    RegisterFailHandler(Fail)
    RunSpecs(t, "Sample Suite")
}
There isn’t much to explain here. We only need to understand that the RegisterFailHandler handles the failures and allows Ginkgo to print out the test report. The RunSpecs function does the heavy lifting and actually runs all the test cases.
Now, we add a test case.
package sample
import (
. "github.com/onsi/ginkgo"
. "github.com/onsi/gomega"
)
var _ = Describe("Checking the Add function", func() {
    Context("Valid inputs for add function", func() {
       It("Should return the correct result given 2 integers", func() {
            result, _ := Add(2, 2)
            Expect(result).Should(Equal(4))
       })
    })
})
Ok. That may seem like a lot, but let’s dissect it line-by-line. If we look at the test case closely, it actually reads like English and is easy to understand. Let’s dive deeper into the what we’ve done here.
- First, we’ve imported the ginkgo and gomega packages. We’ve used dot imports to make the code cleaner and more readable. This is not necessary but it’s a nice-to-have.
- The “Describe” container helps us expressively organise the test code. This text will be printed in the terminal output during a run. It also allows us to bundle functionalities together
- The “Context” container describes a scenario. Writing clear, concise messages here reduces a lot of pain going forward. There have been instances where I’ve re-visited code after a long period of time and I’ve forgotten what the tests do. Instead of reading through the entire test code, I can simply look at the “Describe” & “Context” descriptions and quickly understand the test function.
- The “It” closure defines a certain spec that we want to assert.
- The function “Expect” performs the actual assertion. We use Gomega which exposes decorator functions and makes the assertions readable and understandable. That’s the beauty of BDD. This reads like English!
Now let’s run the test. In your terminal, type the following command and see the output
ginkgo -v
You can also run Ginkgo in “watch” mode and it will automatically run your test suite for any changes in your source code or test file. It’s useful while developing to constantly keep a check on regressions.
ginkgo watch -v
Productivity Hack: You can couple this with –notify and receive desktop notifications after each run. If you are on a Linux system, then you would need to install notify-send.
ginkgo watch -v --notify
Great, now that we have the BDD cycle running, let’s add another assertion to this test case which will fail.
var _ = Describe("Checking the Add function", func() {
    Context("Valid inputs for add function", func() {
        It("Should return the correct result given 2 integers", func() {
            result, err := Add(2, 2)
            Expect(result).Should(Equal(4))
            Expect(err).ShouldNot(BeNil())
        })
    })
})
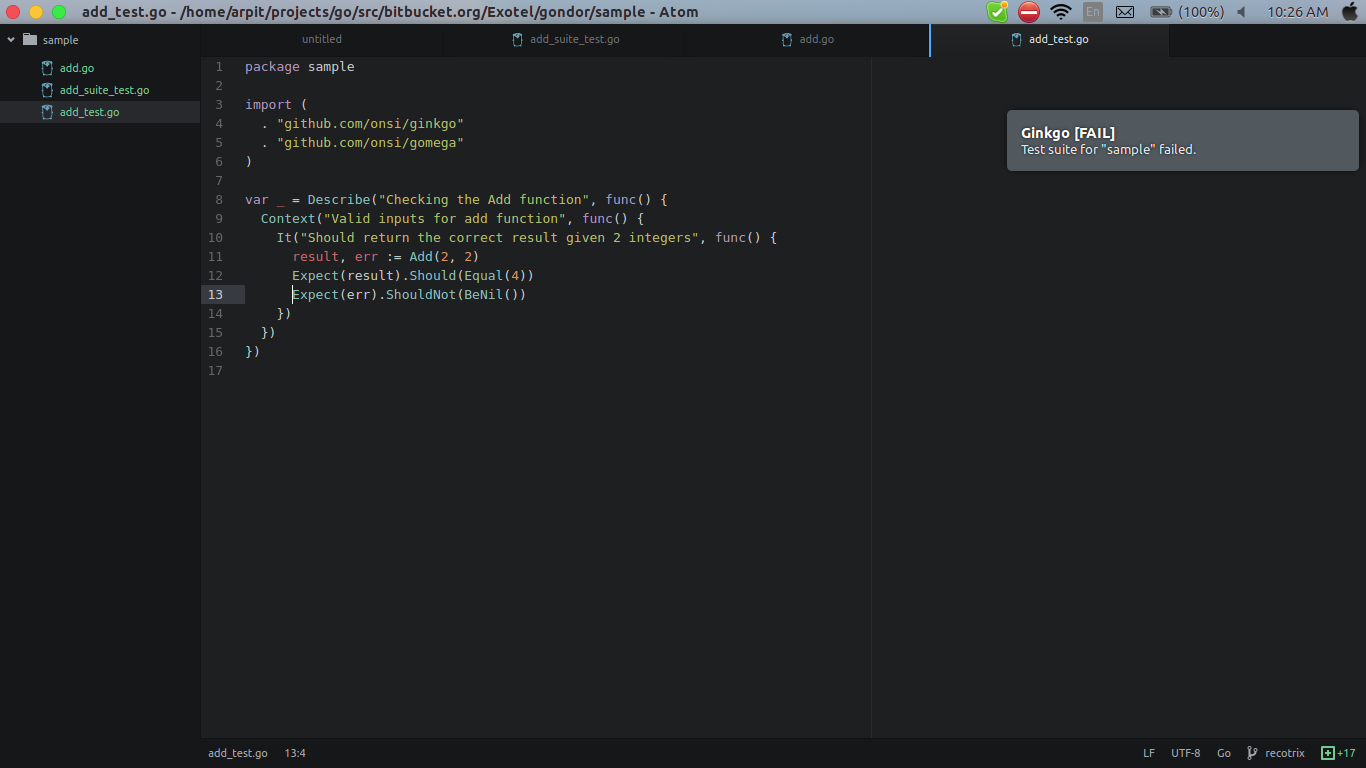
Here, the error returned from the function was nil, but I’m asserting that it shouldn’t be nil. Hence, the test case fails & I get notified almost instantaneously that I’ve done something wrong. All this, without leaving my editor and breaking my flow. Awesome sauce!
Let’s correct that erroneous test and see what happens.
var _ = Describe("Checking the Add function", func() {
    Context("Valid inputs for add function", func() {
        It("Should return the correct result given 2 integers", func() {
            result, err := Add(2, 2)
            Expect(result).Should(Equal(4))
            Expect(err).Should(BeNil())
        })
    })
})

This was a quick primer on BDD testing in Golang using Ginkgo. We can do a lot more with the framework. Custom reports, custom modules, table driven tests; you name it and we can achieve that with Ginkgo. I will strongly urge you to check out their documentation here.
Happy BDDing 😀


 +91-8088919888
 +61-2-8073-0559
 +62-215-098-4960
 +60-3-2771-2799
 +65-6951-5460